23.1. Define Audits
The Define Audits screen is the central location for managing all custom audits in clearPath. To access it navigate to Custom Audits | Define Audits.
The list view displays all defined custom audits along with key information including the audit name, category, status, number of pages, questions, and the overall completion percentage.
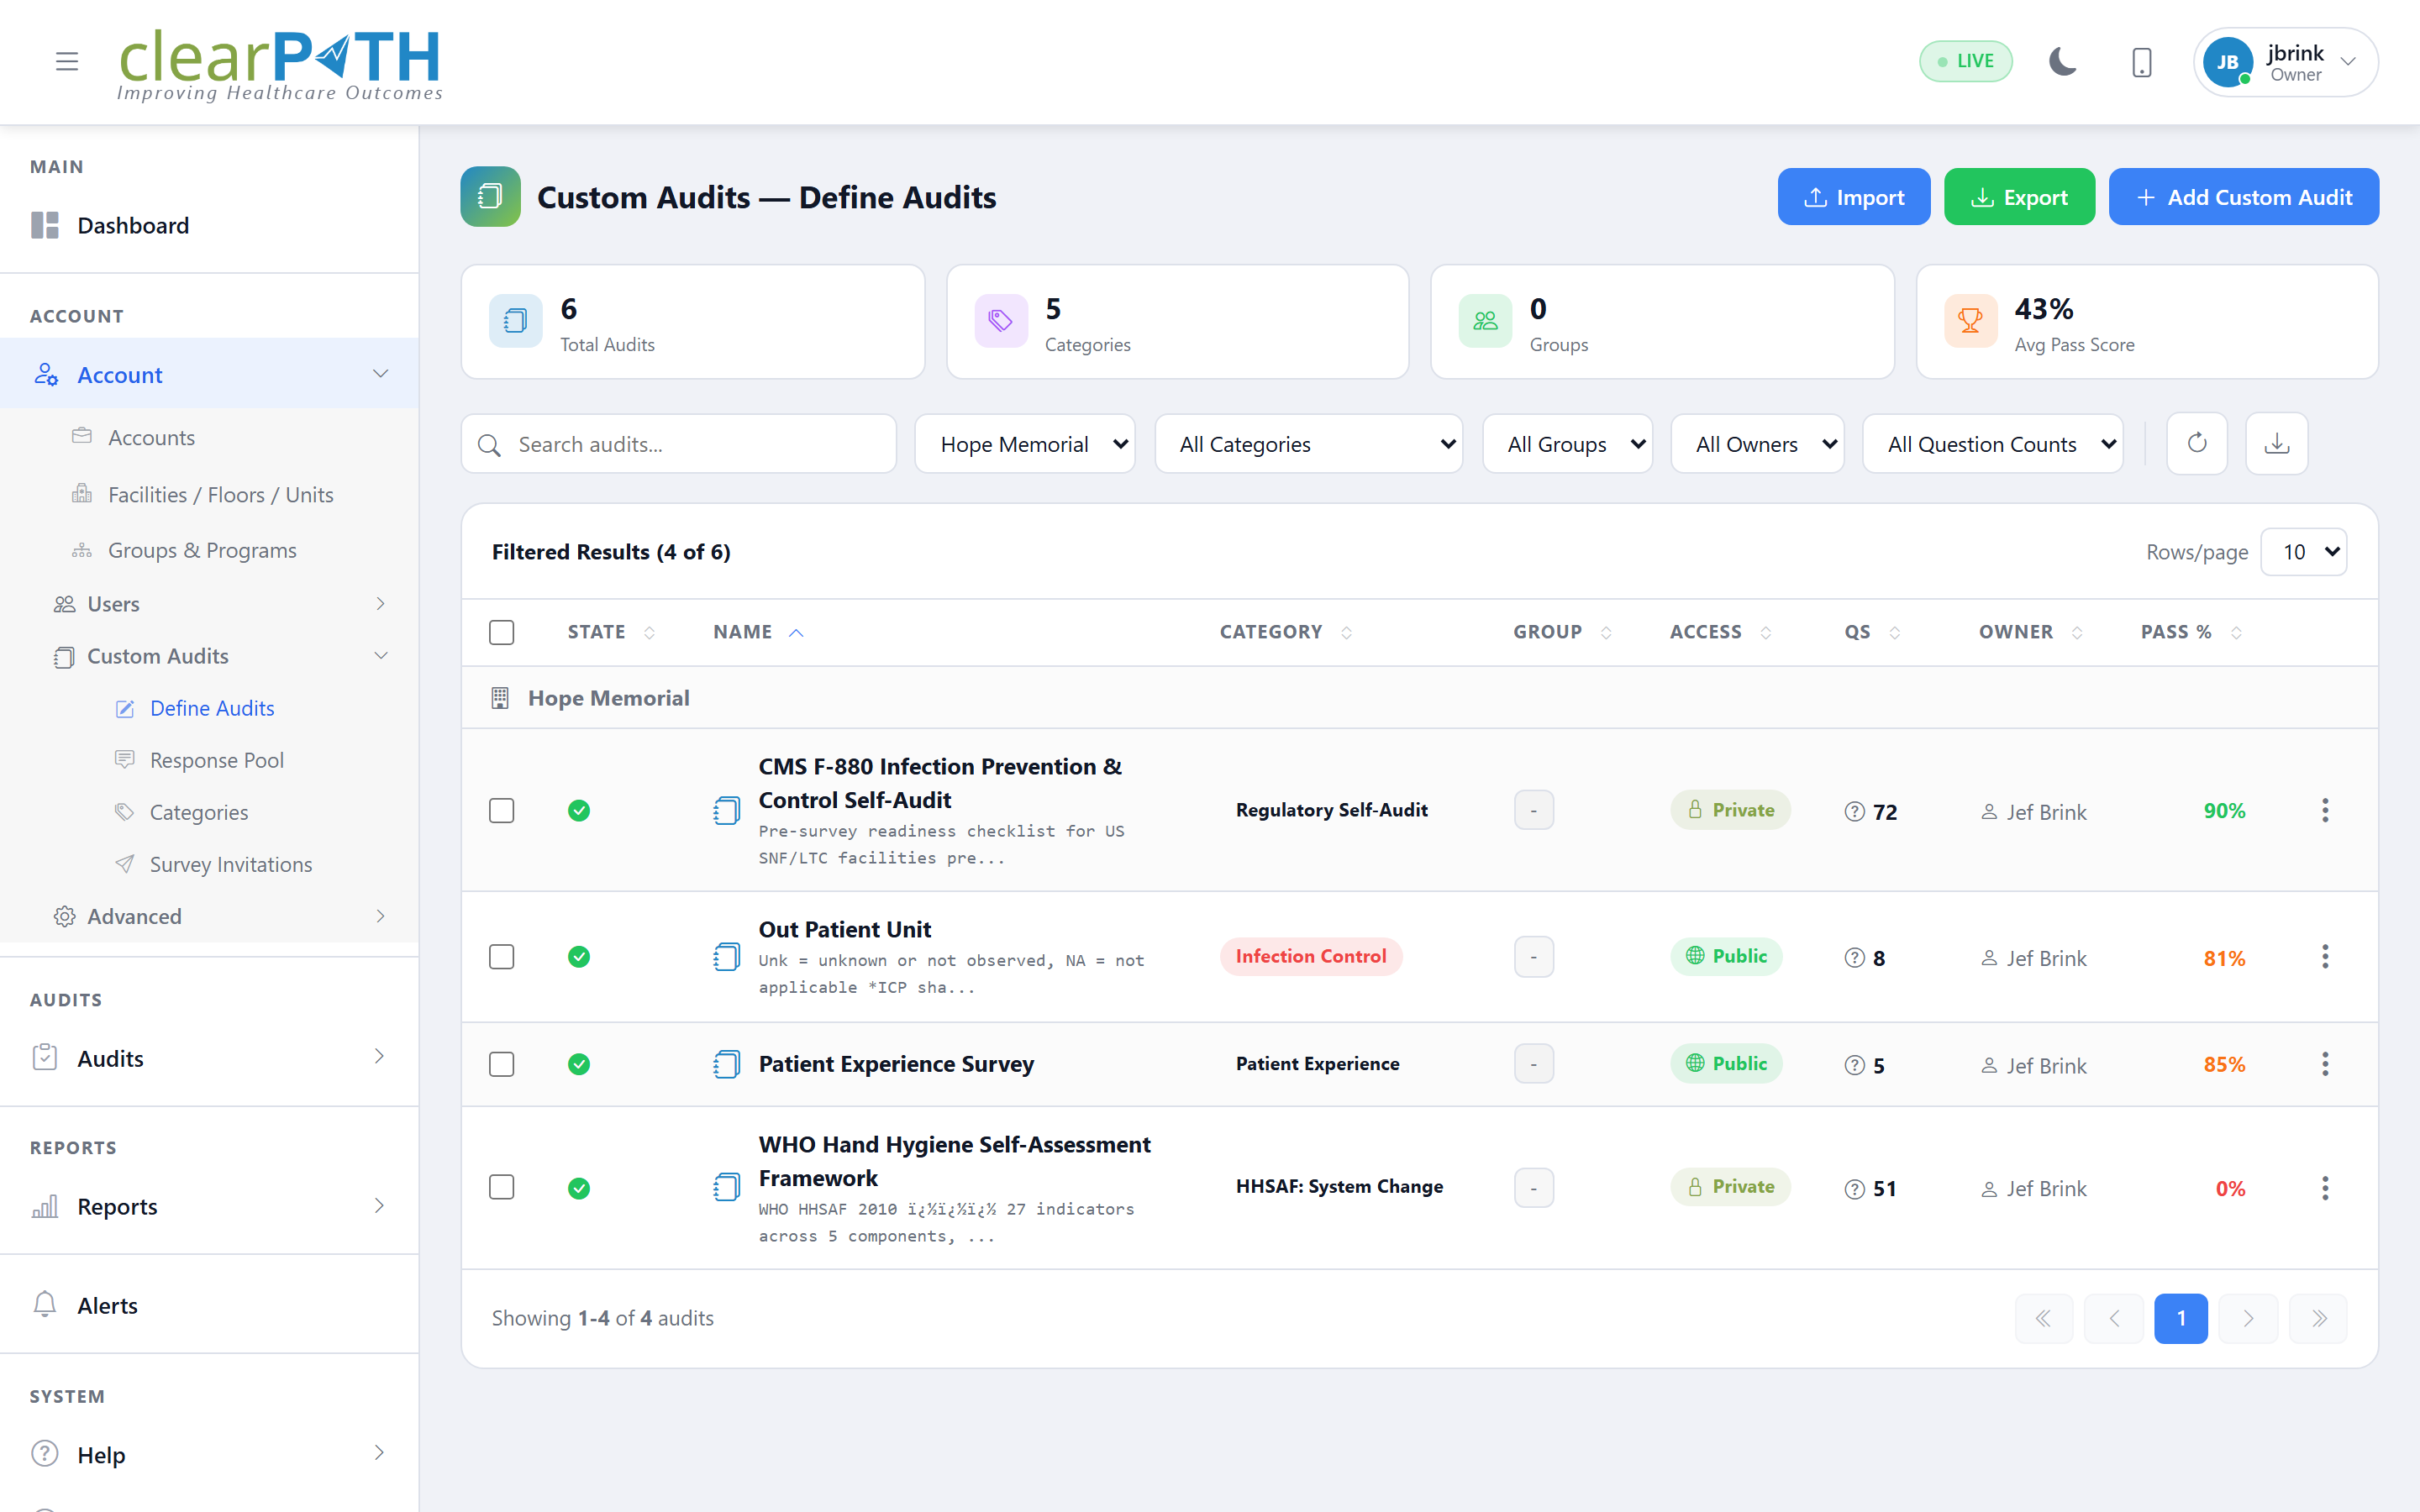
Summary cards at the top of the screen provide a quick overview of the total number of audits, the number of active groups, owners, and the overall question count.
Use the search bar and filter drop downs to quickly locate a specific audit by name, category, group, or owner.
23.1.1. Creating a New Custom Audit
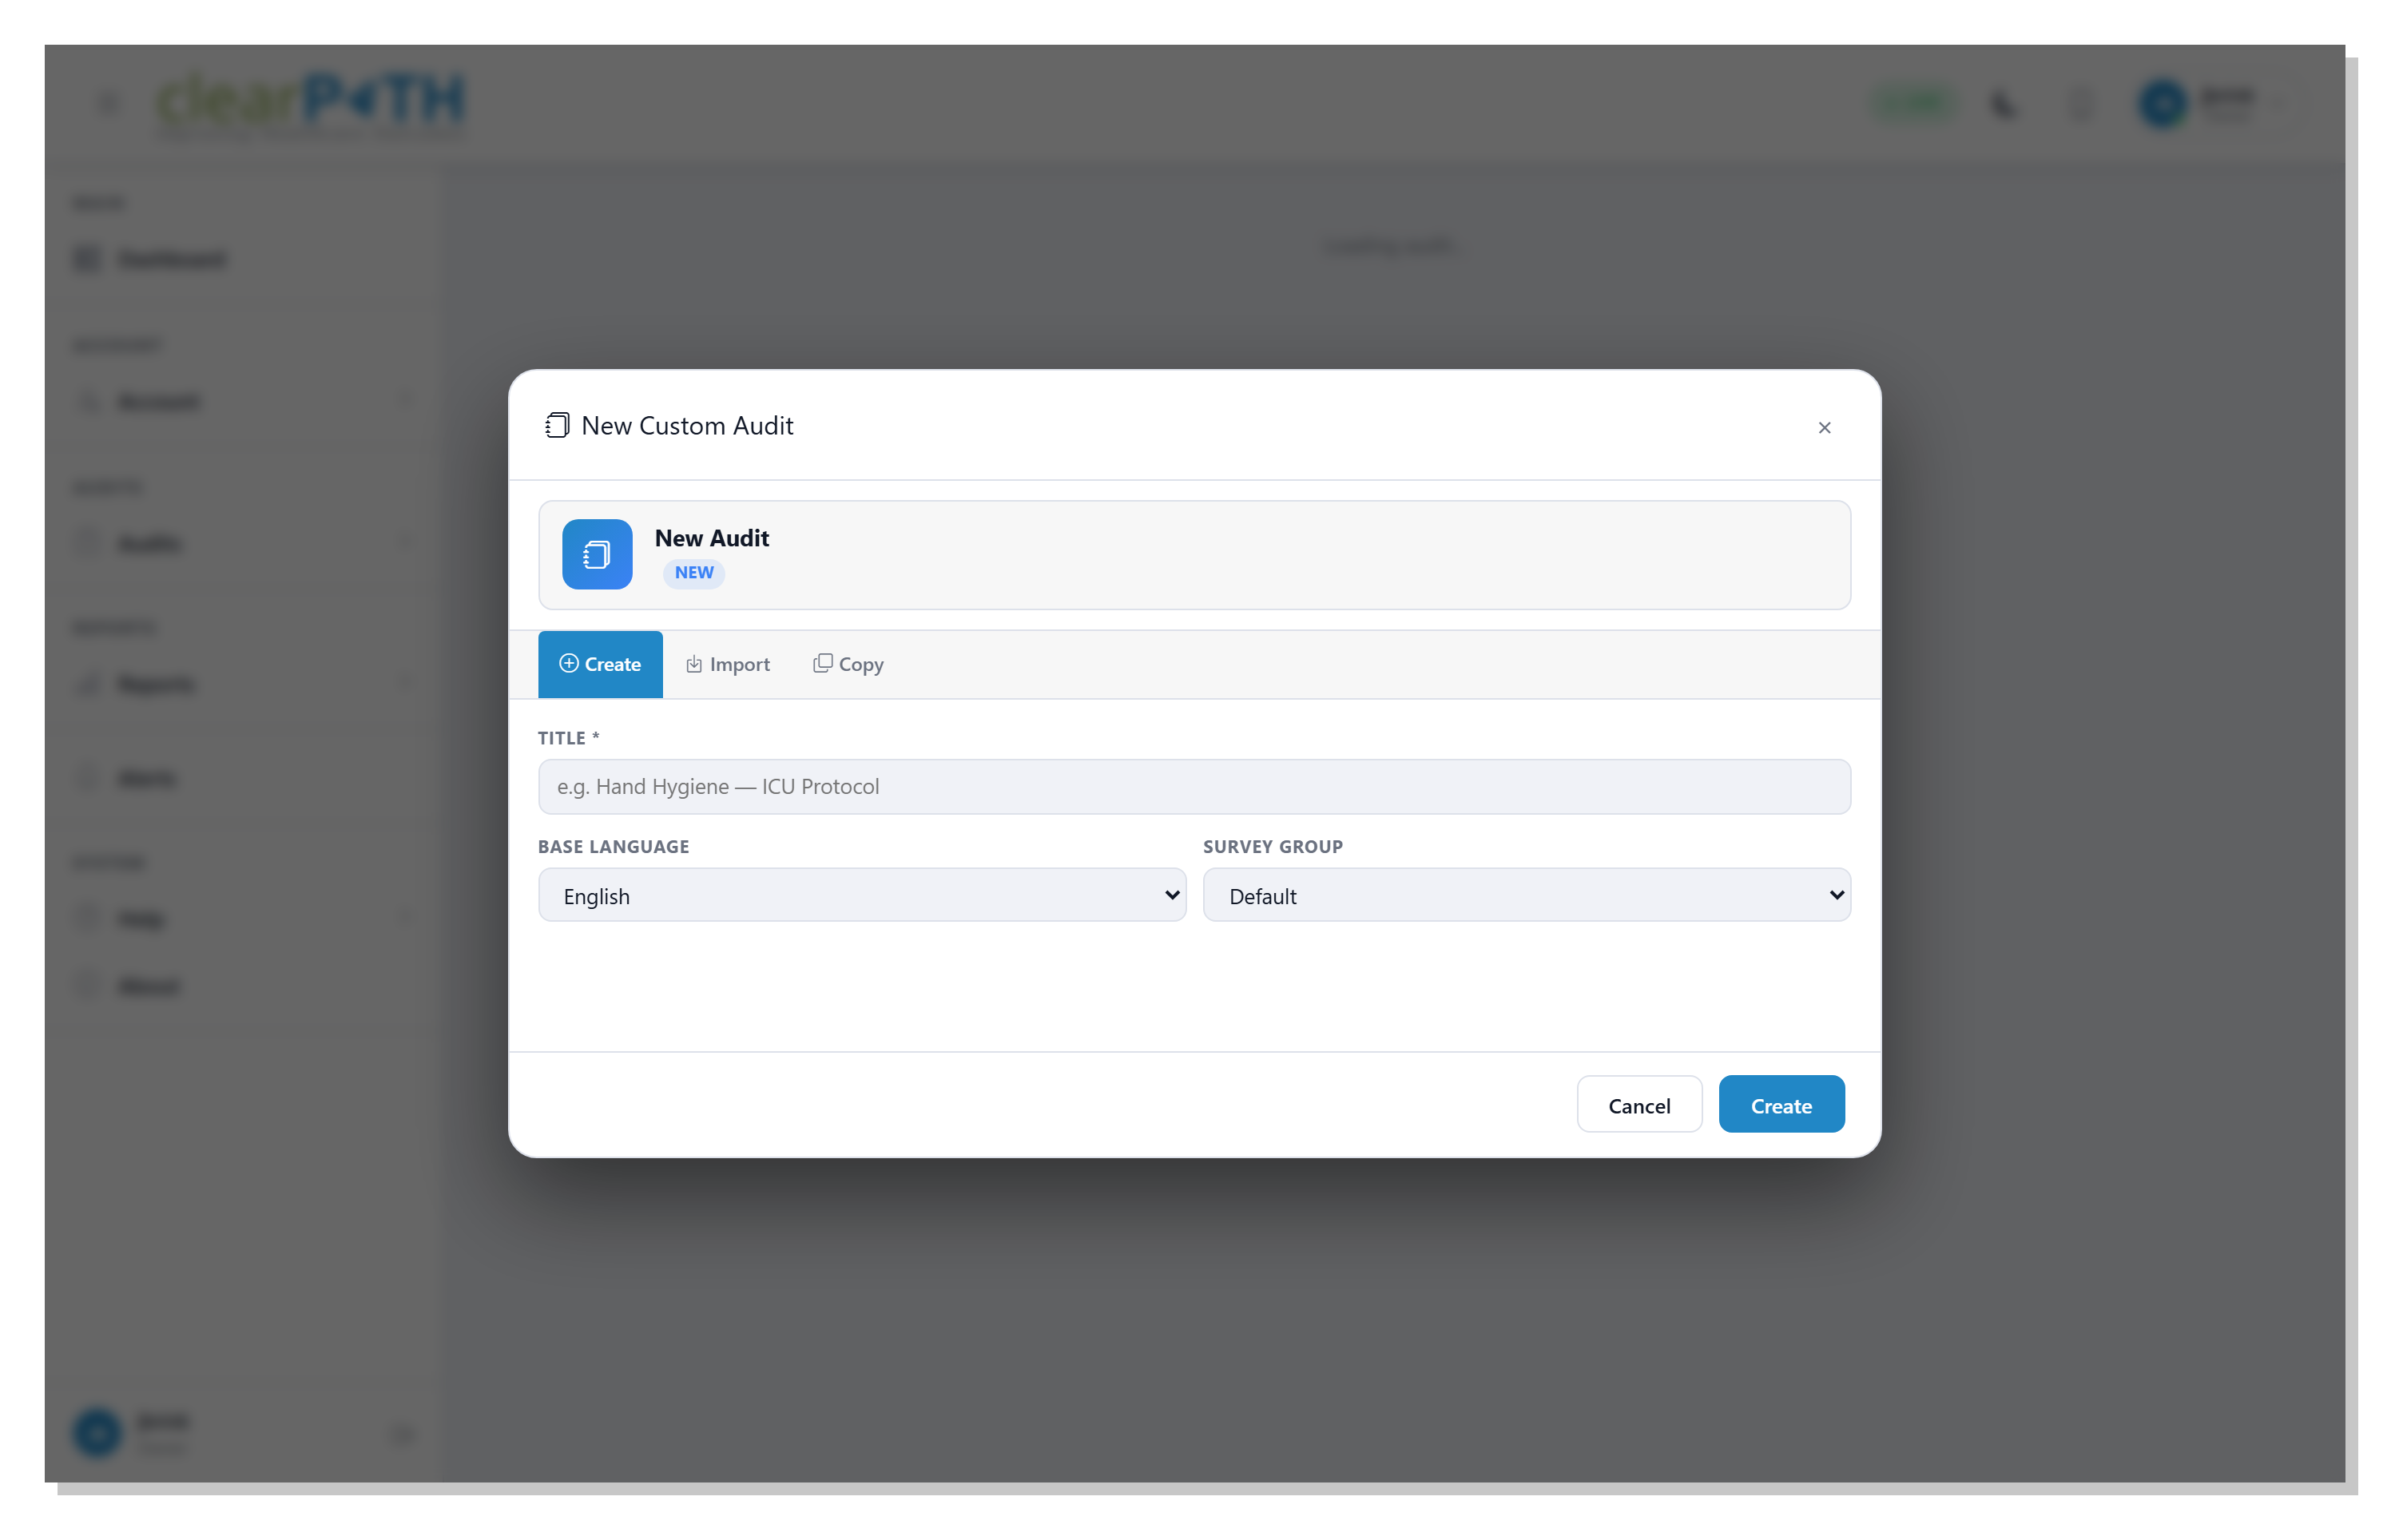
To create a new custom audit click the + Add Audit button. The New Custom Audit dialog provides three options:
Create – Build a new audit from scratch
Import – Import an audit definition from a
.cpcaxfile (see Import and Export below)Copy – Duplicate an existing audit as a starting point
Field |
Description |
|---|---|
Title |
The name of the custom audit (e.g. Hand Hygiene – ICU Protocol). |
Base Language |
The primary language for the audit content. |
Survey Group |
The group this audit belongs to. |
23.1.2. Import and Export
clearPath can move a complete custom-audit definition between sites using
the portable .cpcax (clearPath Custom Audit eXchange) bundle format.
This is the recommended way to share audits between a sandbox and
production tenant, between separate hospital systems, or to ship a
prebuilt template from sigmaIQ to a customer.
23.1.2.1. Exporting an Audit
From the audit list, open the row’s three-dot menu and choose
Export Definition. The browser downloads a single file named
after the audit (for example Hand Hygiene -- ICU Protocol.cpcax).
The export captures everything needed to recreate the audit on another
system:
The audit header (title, base language, status, owner)
All pages, question groups, and questions in their defined order
The category the audit is assigned to
All response sets and response options referenced by the audit’s questions
The audit’s group assignments
Page Settings (theme, questions per page, behaviour flags)
No session data, response data, or tenant-specific identifiers are included – the bundle is a pure template.
23.1.2.2. Importing an Audit
To import, click the Import button at the top of the Define
Audits page and choose a .cpcax file. clearPath validates the
bundle, recreates the audit (and any missing categories, response sets,
and response options) under the current account, and opens it in the
list ready to edit.
If you are signed in as a system-level user (root account), clearPath prompts you to choose which account the imported audit should belong to before the import completes. Standard users always import into their own account.
23.1.2.3. The .cpcax File Format
A .cpcax file is a standard ZIP archive containing a small set of
JSON documents. You can open one with any zip tool to inspect or edit
its contents before importing. The archive contains:
File |
Contents |
|---|---|
|
Format identifier and version ( |
|
The audit header – name, base language, status, ordering, and the structural tree of pages, question groups, and questions. |
|
The category the audit was assigned to. Re-created on import if a matching category does not already exist on the destination tenant. |
|
The list of survey groups defined in the source bundle. |
|
Which groups the audit is a member of, so group membership is restored after import. |
|
Full text and metadata for every question used by the audit, including localised translations. |
|
Response sets (such as Yes / No / N/A or a Likert scale) referenced by the audit’s questions. |
|
The individual options that make up each response set, with their order, score, and translations. |
|
The Page Settings record (theme, questions per page, comment). |
Because the format is open and JSON-based, .cpcax files are also a
convenient way to back up an individual audit definition, version it
in source control, or hand-edit a template before importing it back.
23.1.3. Audit Structure
After creating an audit you are taken to the audit editor. The editor is split into two tabs:
Structure – Define the layout of the audit by adding questions and question groups
Settings – Configure audit-level settings

Switching to the Questions and Groups tab reveals the question tree on the left and a detail panel on the right.
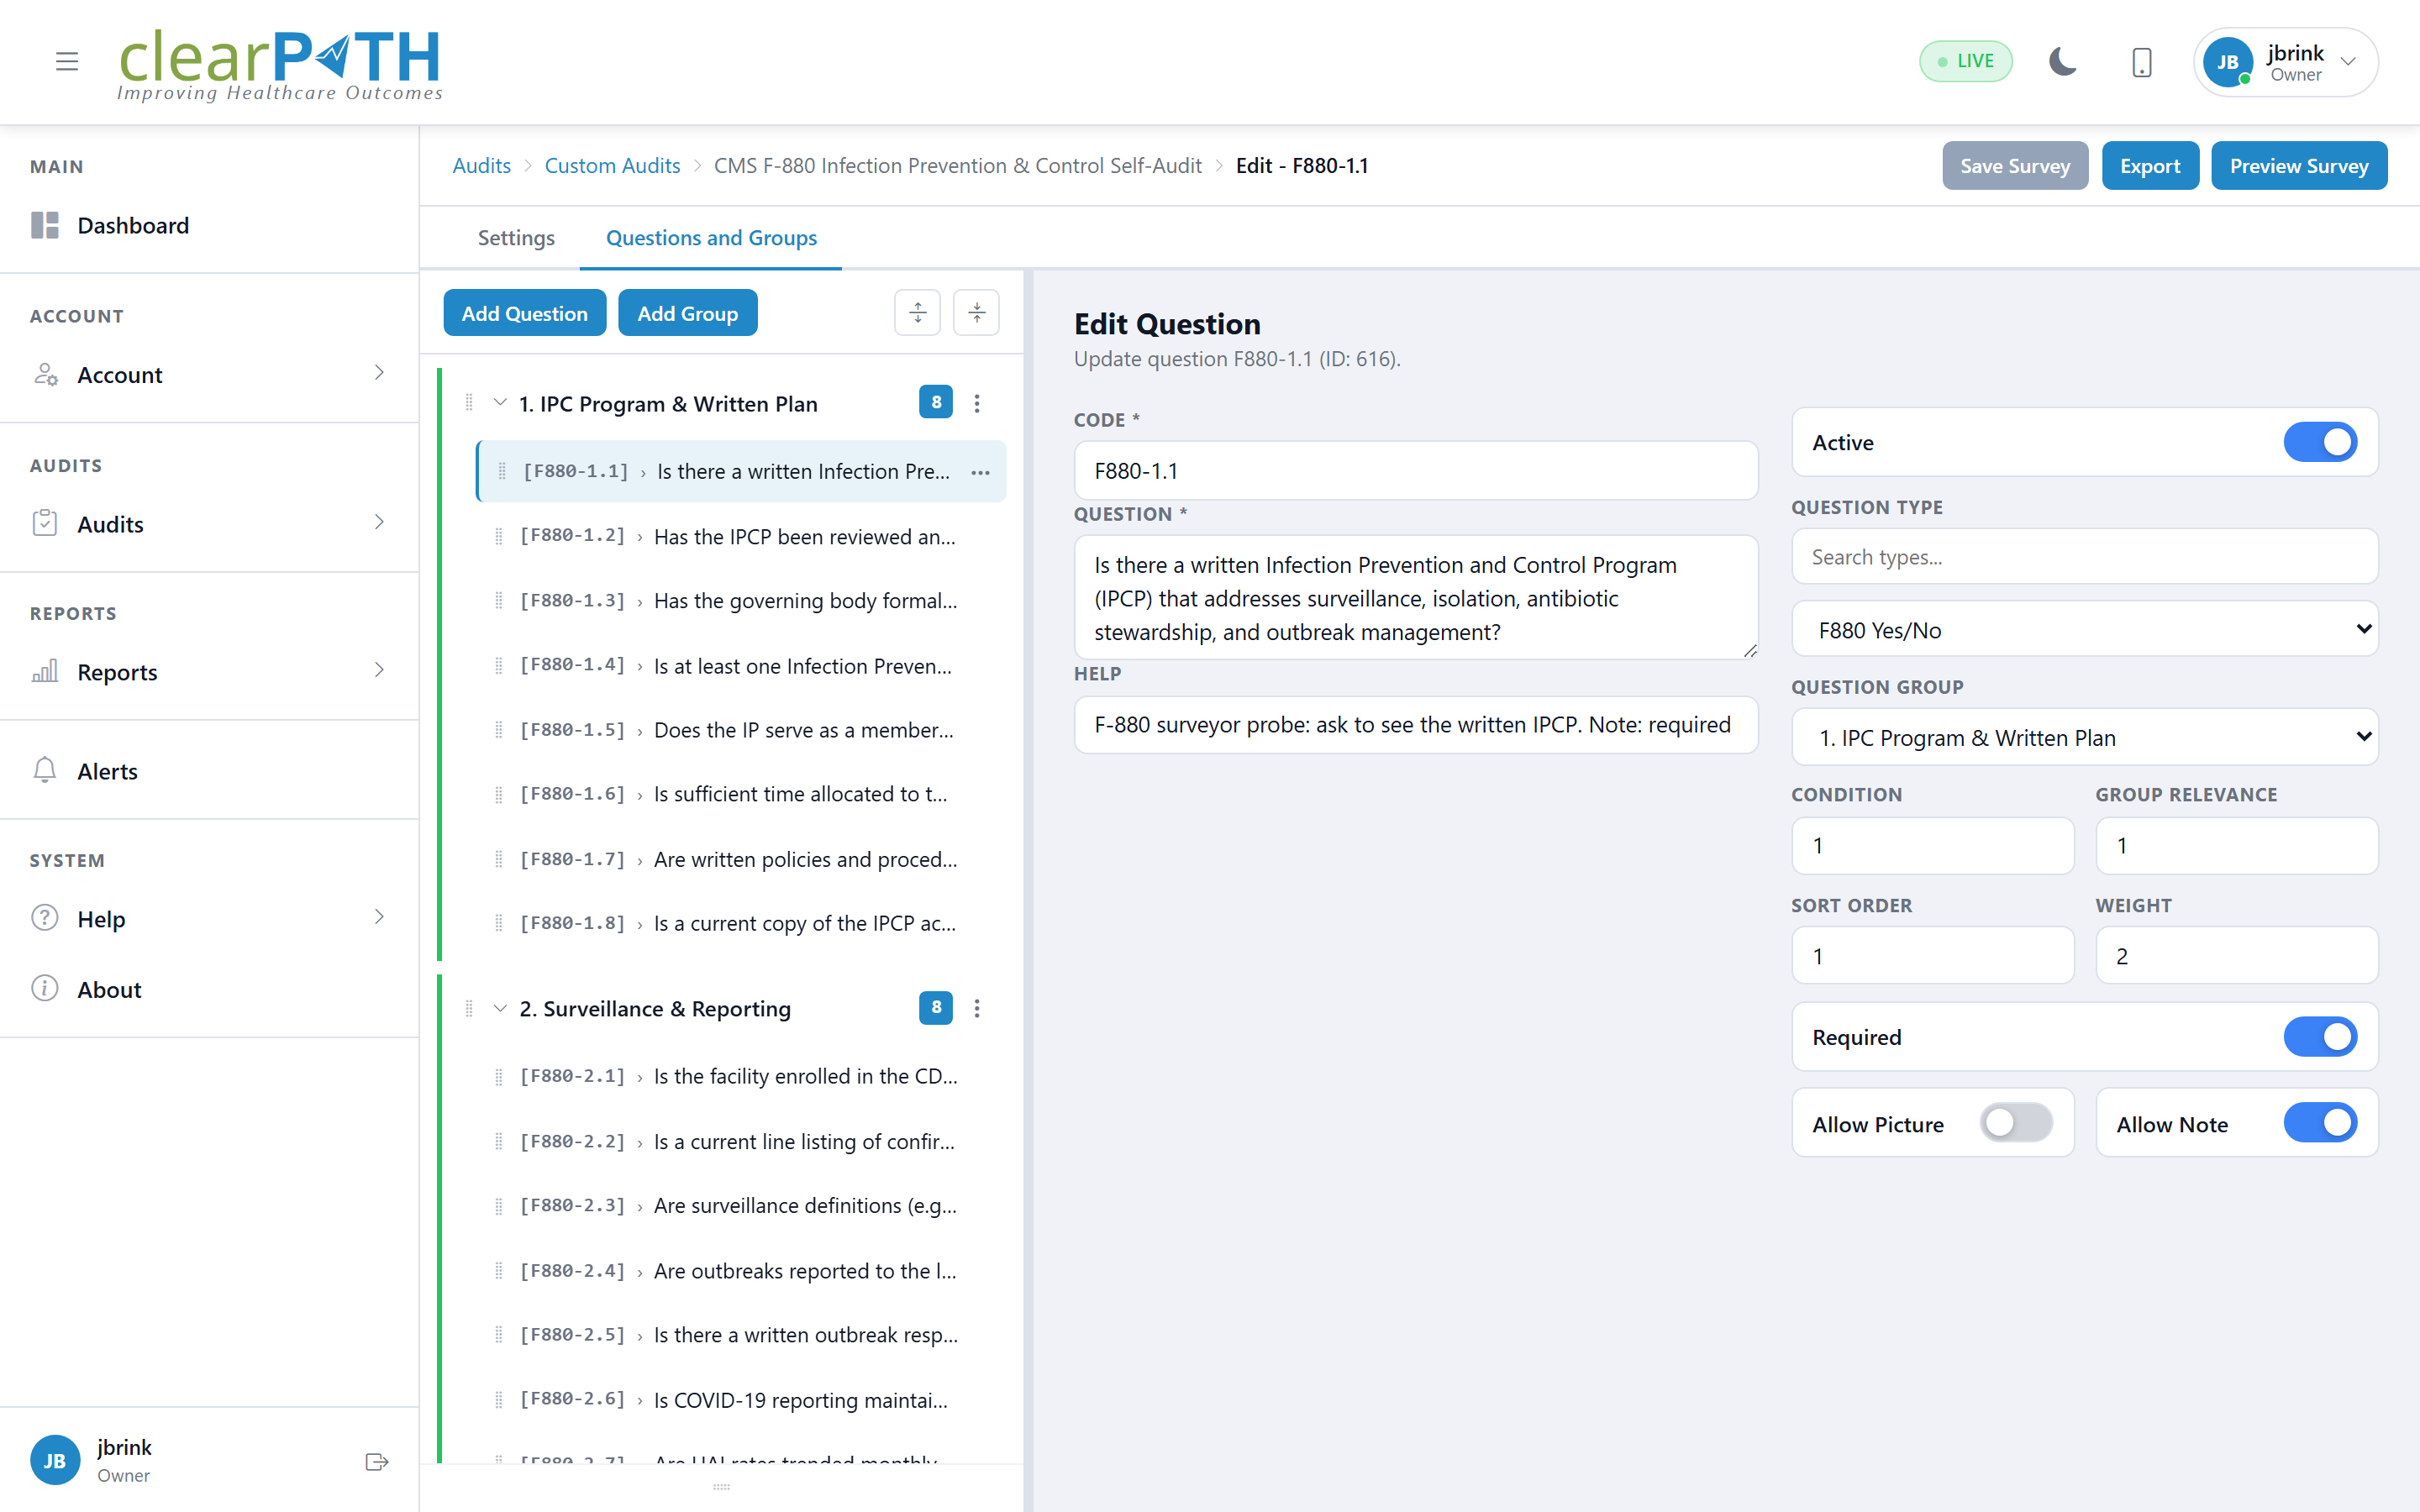
Use the Add question button to add individual questions, or the + Add group button to organize questions into logical sections. Questions and groups can be reordered using the sort controls.
The right panel displays the details of the currently selected question or group.
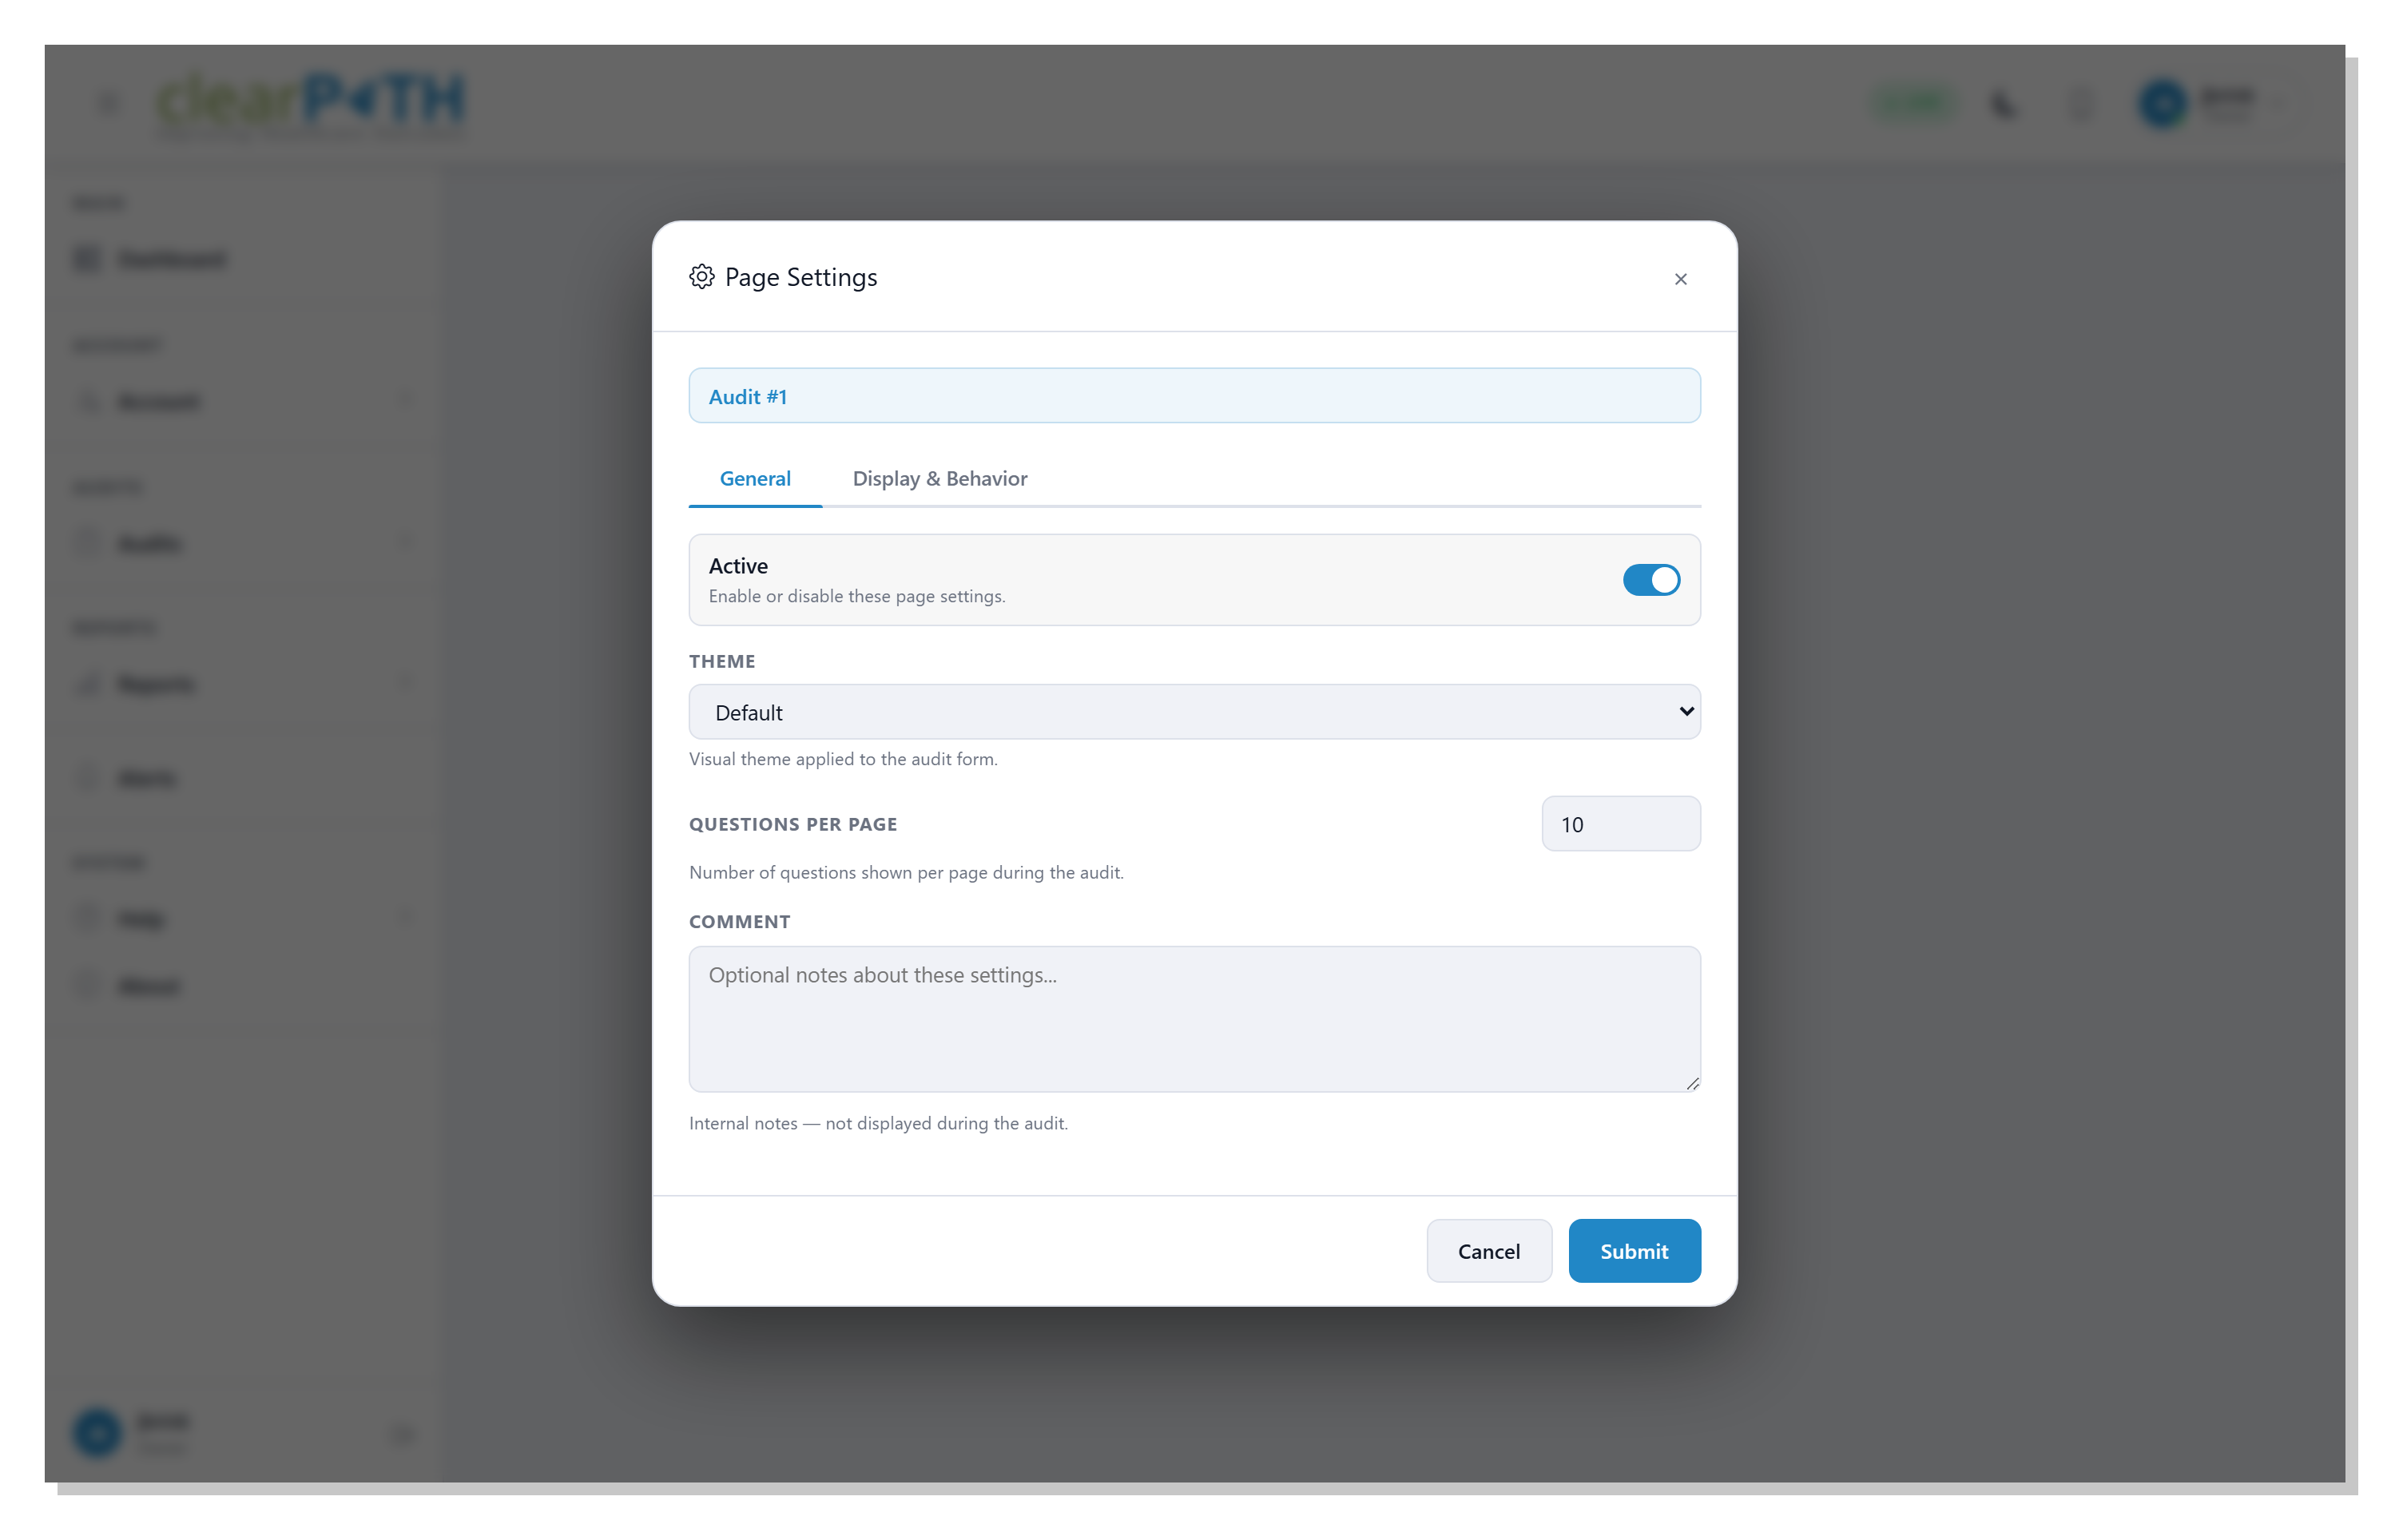
23.1.4. Page Settings
Page Settings allow you to configure the display and behavior of the audit form. To access Page Settings click on Tools and select Page Settings.
Field |
Description |
|---|---|
Active |
Enable or disable the page settings. |
Theme |
The visual theme applied to the audit form. |
Questions Per Page |
The number of questions shown per page during the audit. |
Comment |
Internal notes – not displayed during the audit. |
23.1.5. Tools
The Tools menu at the top right of the audit editor provides additional options for managing the audit including Preview Survey, Page Settings, and the One Time Survey Link toggle.
Preview Survey – Launch a preview of the audit to see how it will appear to auditors
One Time Survey Link – Generate a single-use link that can be shared externally
Edit – Toggle edit mode on and off