12. Auditing Devices
Every phone, tablet, or PC that runs cp2go registers itself with clearPath as an audit device. The Auditing Devices page is where you see at a glance which devices are connected, who is using them, how recently they synced, and where they last phoned home from. It is also where you approve a new device the first time it connects.
To open the list, go to Account | Advanced | Audit Devices.
12.1. Device List
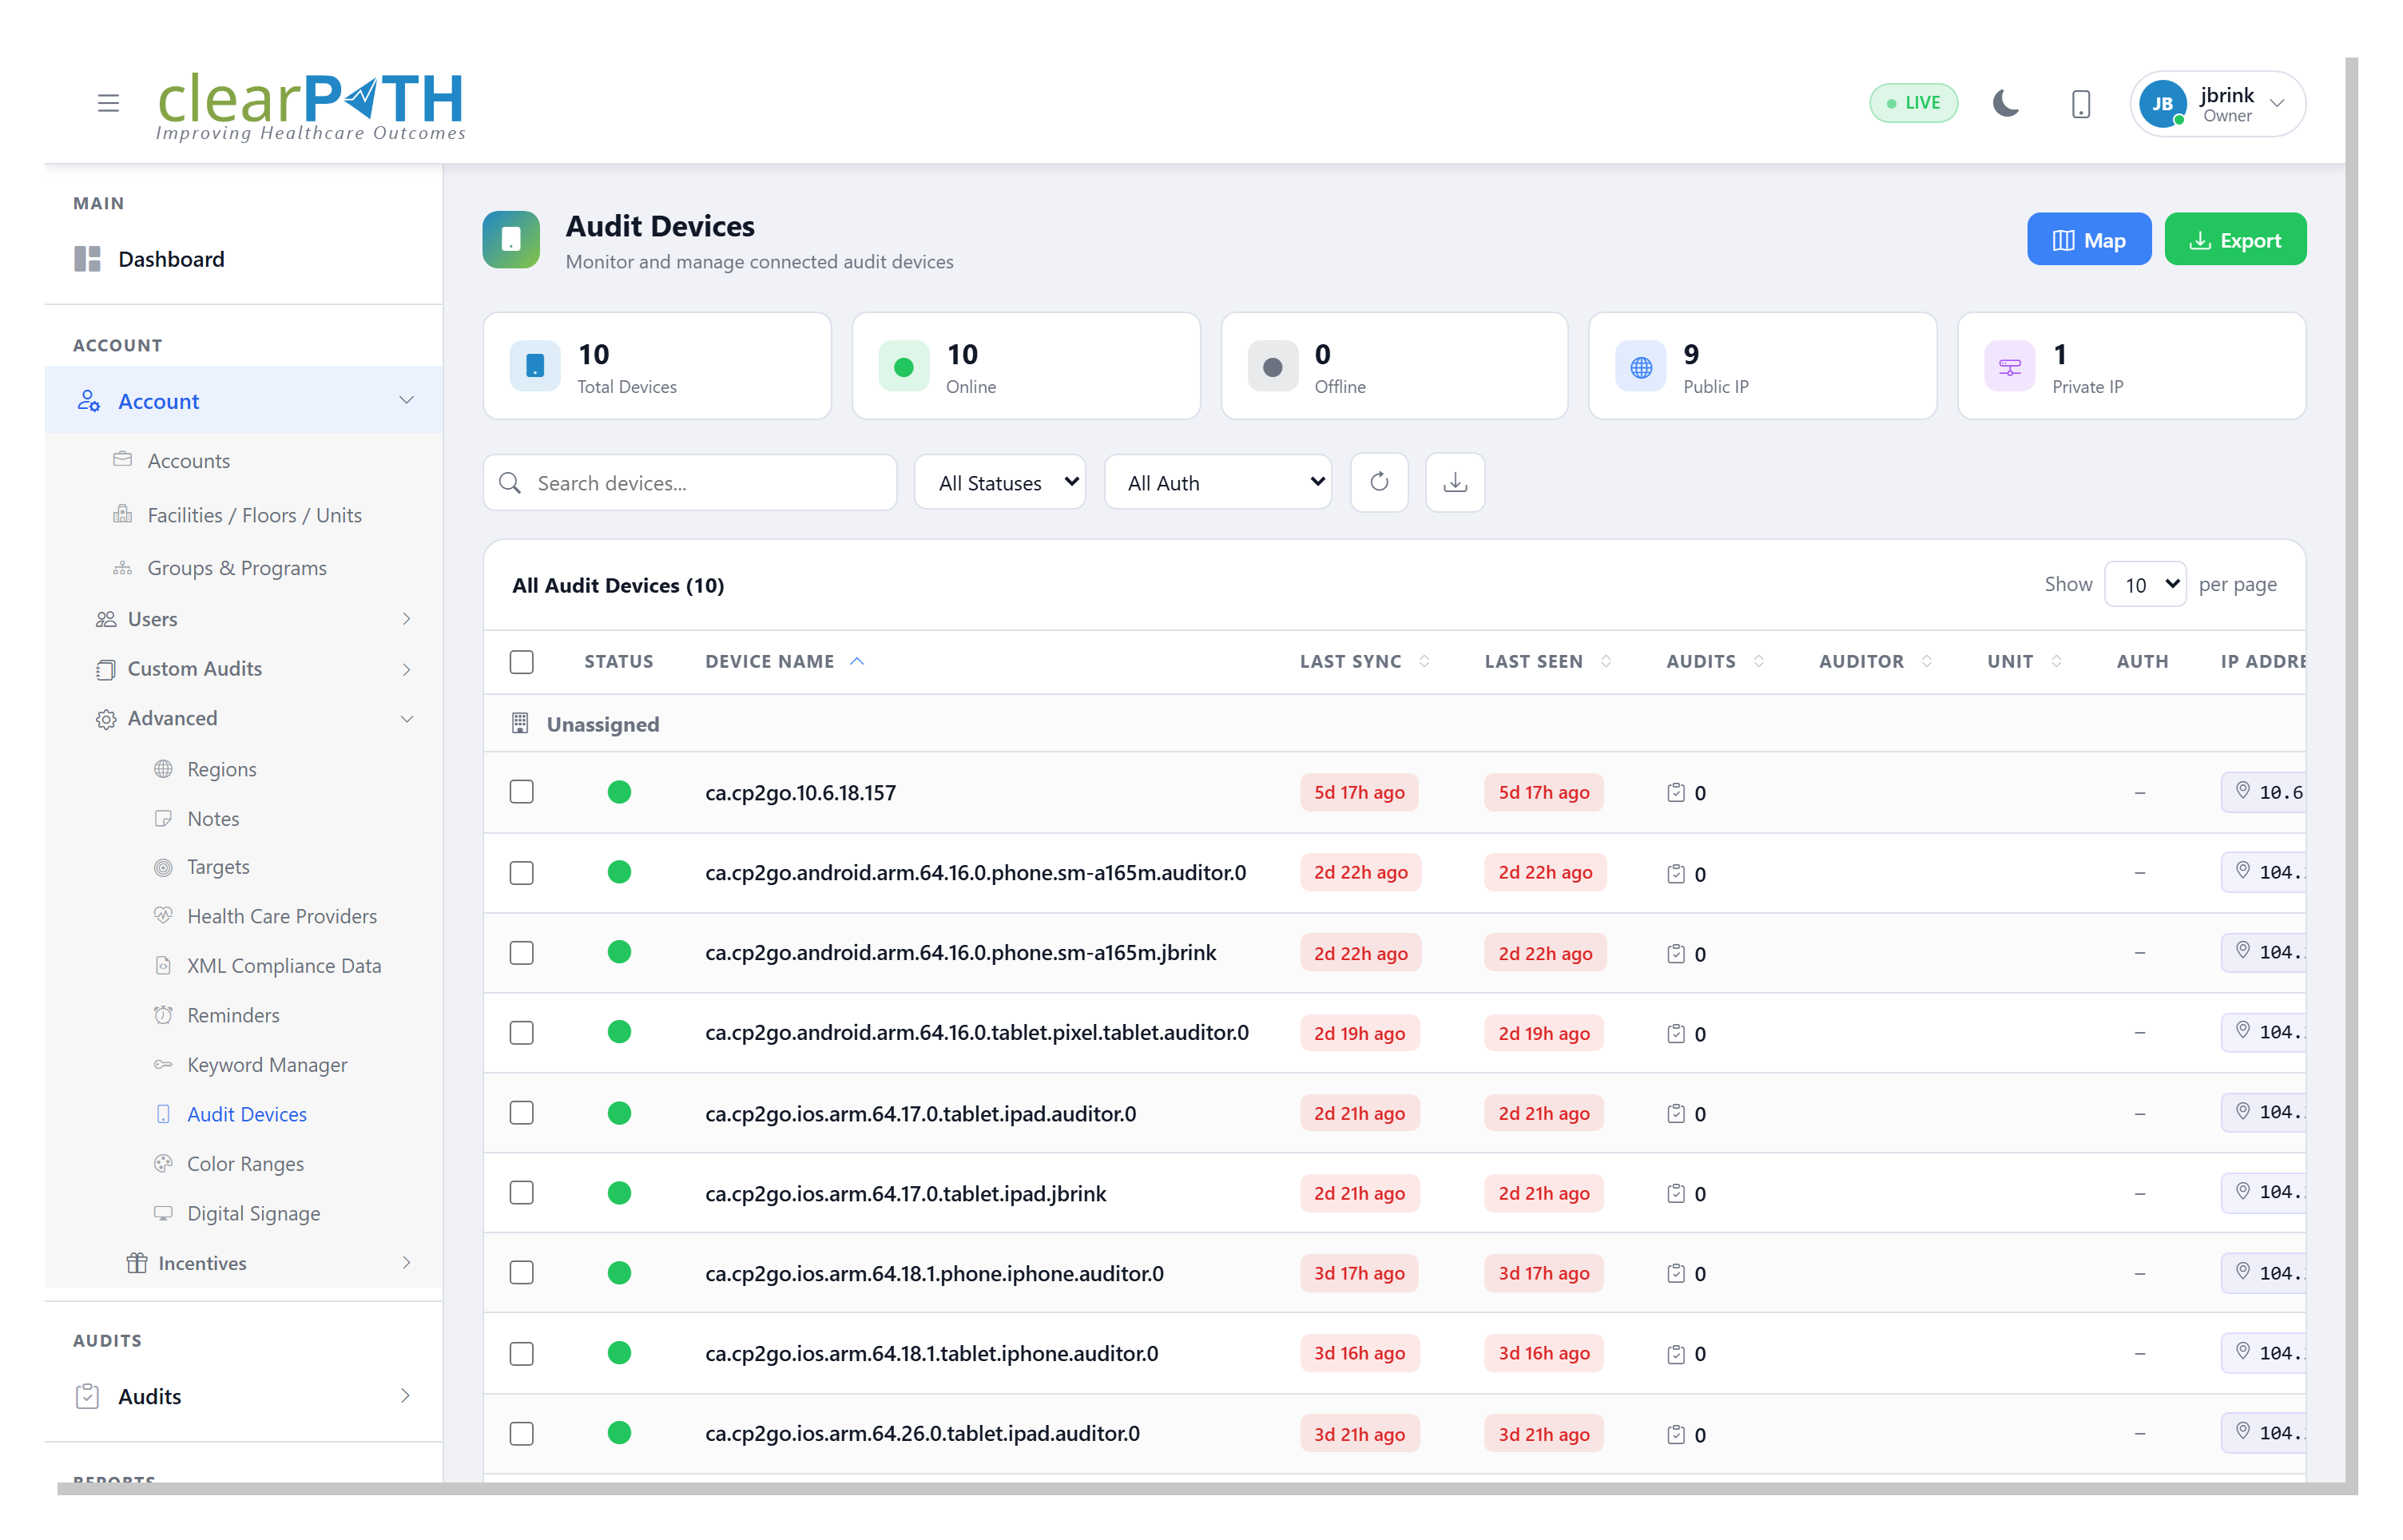
12.1.1. Stat Chips
Cards across the top give you an immediate rollup:
Total Devices— every registered device.Online— devices that have synced within the last hour.Offline— devices that have not synced recently.Public IP— devices connecting from a public IP address.Private IP— devices on a private network (inside a firewall or NAT).
12.1.2. Page Header Actions
Map— opens the Audit Device Map view of every device plotted by IP location.Export— saves the current (filtered) list to HTML, CSV, or Excel.
12.1.3. Filtering
The toolbar scopes the list without reloading the page:
Search devices…— matches text anywhere in the device name, auditor, or unit.All Statuses— showOnline,Offline, or all devices. A device is online when it has synced within the last hour.All Auth— showPending Approval,Approved, orRevokeddevices. Use this to find new devices that are waiting to be let in.Refresh — reload the list without losing your filter selections.
12.1.4. Row Columns
Each row is one device:
Status— green dot when the device is online, grey when it is offline.Device Name— the identifier cp2go registers with when it first connects. By default this encodes the platform and device id (for exampleca.cp2go.ios.arm.64.0.tablet.ipad.auditor.0); you can rename it from the edit dialog.Last Sync— when the device last uploaded observations.Last Seen— when the device last checked in (even without uploading).Audits— how many audit sessions have been recorded on this device.Auditor— the user currently signed in on the device.Unit— the patient care area the device is assigned to, if any.Auth—Approved/Pending/Revoked.IP Address— click the icon to pop up an IP location map showing where the device last connected from.
The Status and Auth pills on each row are labels only. To
change a device’s assigned account or status, use the row action
menu below.
12.1.6. Bulk Selection
Tick one or more checkboxes to reveal the bulk-selection bar, then
Delete Selected to remove several devices at once. Click the
x to clear the selection.
12.2. Editing a Device
Open the three-dot action menu at the end of any row and choose
Edit to rename the device or change how it’s assigned.
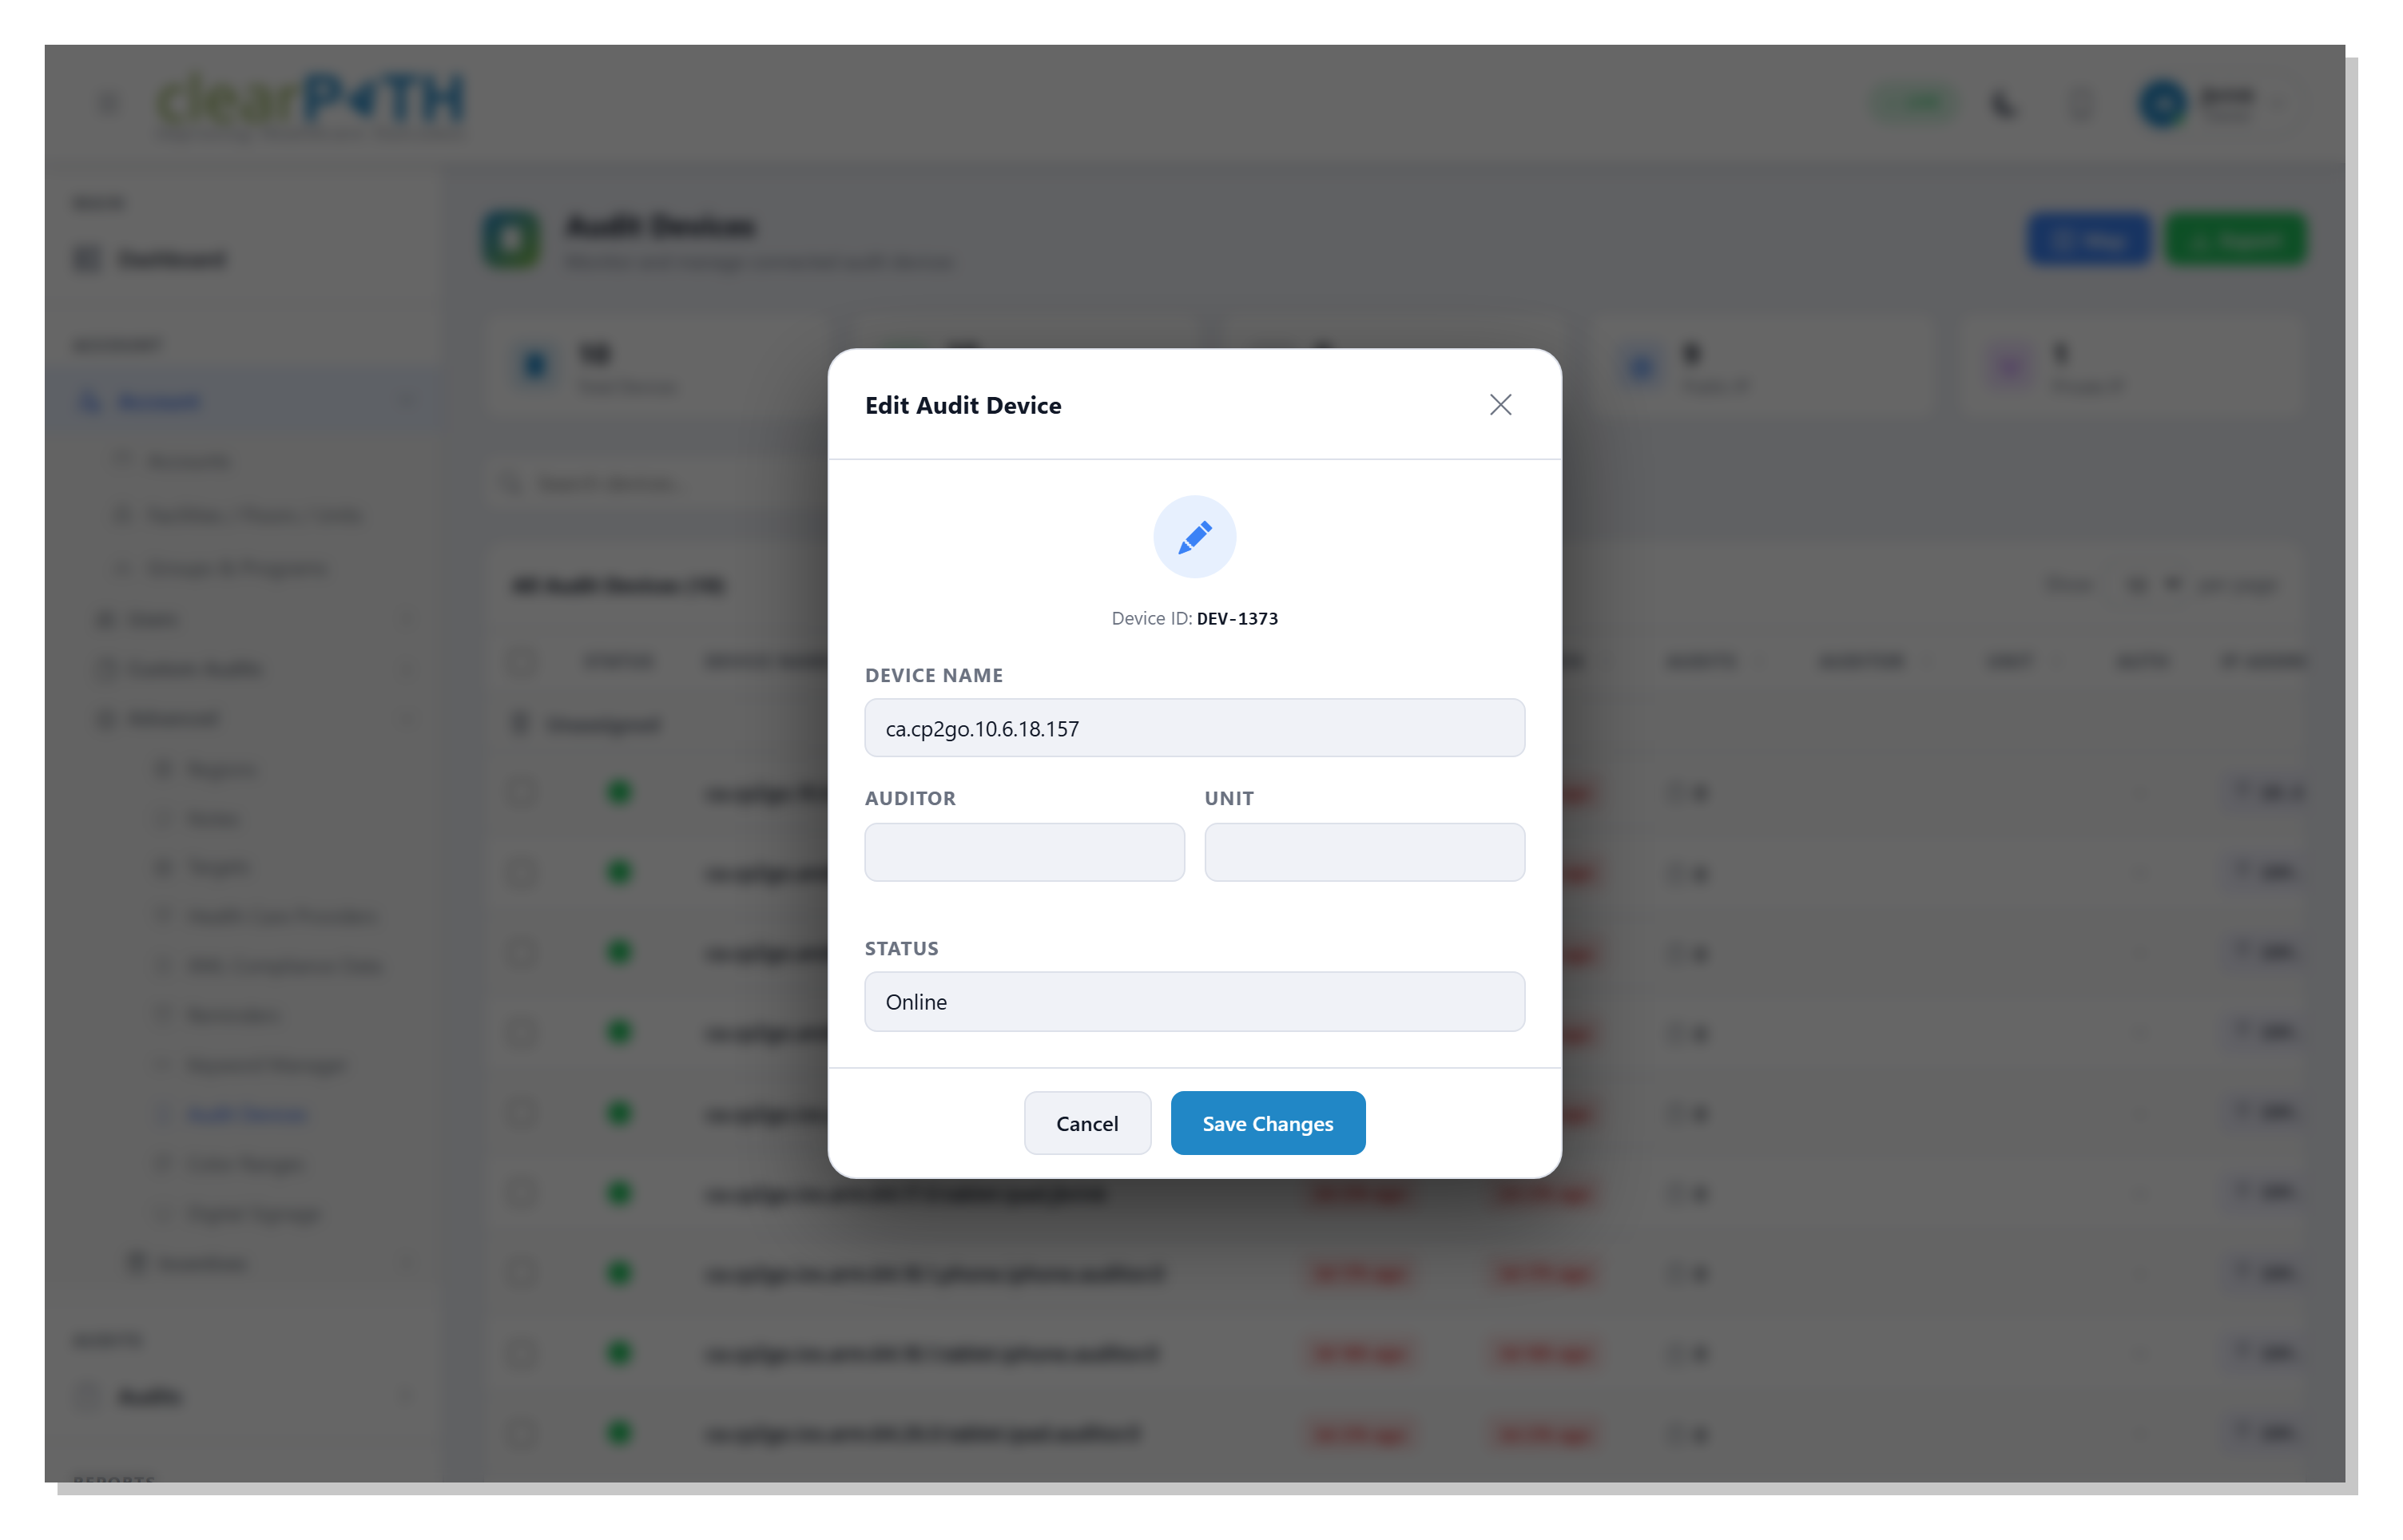
Device ID— the permanent id clearPath assigned to the device. Read-only.Device Name— a friendly name that replaces the auto-generated identifier in lists, reports, and dashboards.Auditor— the default auditor signed in on the device.Unit— the patient care area the device normally audits.Status— mark the deviceOnlineorOfflinemanually. Useful when you need to retire a device without deleting it.
Click Save Changes to keep your edits or Cancel to discard
them.
12.3. Approving a New Device
When someone signs in to cp2go on a new phone, tablet, or PC
using device-code sign-in, the app shows a short six-character code on
its screen and waits. At the same time the device appears in this list
with its auth status set to Pending, and the Auth pill on its
row shows the very same code. Filter the list by Auth →
Pending Approval to find devices that are waiting.
To let the device in, match the code on the device’s screen to the code
in its Auth pill, then open the three-dot action menu on that row and
choose Approve Device. You are prompted to pick the account the
device should be scoped to — the device can only see and upload data
for that account afterwards. Once you approve it, the app finishes
signing in on its own within a few seconds; nobody has to type a
password on the device.
For more detail on what the person using the app sees, see Signing In with a Device Code.
If a device is later lost, stolen, or decommissioned, choose
Revoke Access from the same menu. A revoked device is signed out
and can no longer sync; its past observations stay in place. A
previously revoked device can be brought back online with
Re-approve Device.
12.4. Audit Device Map
The Map view plots every device at the rough geographic location of
its most recent public IP address. It is reached from the Map
button on the device list.
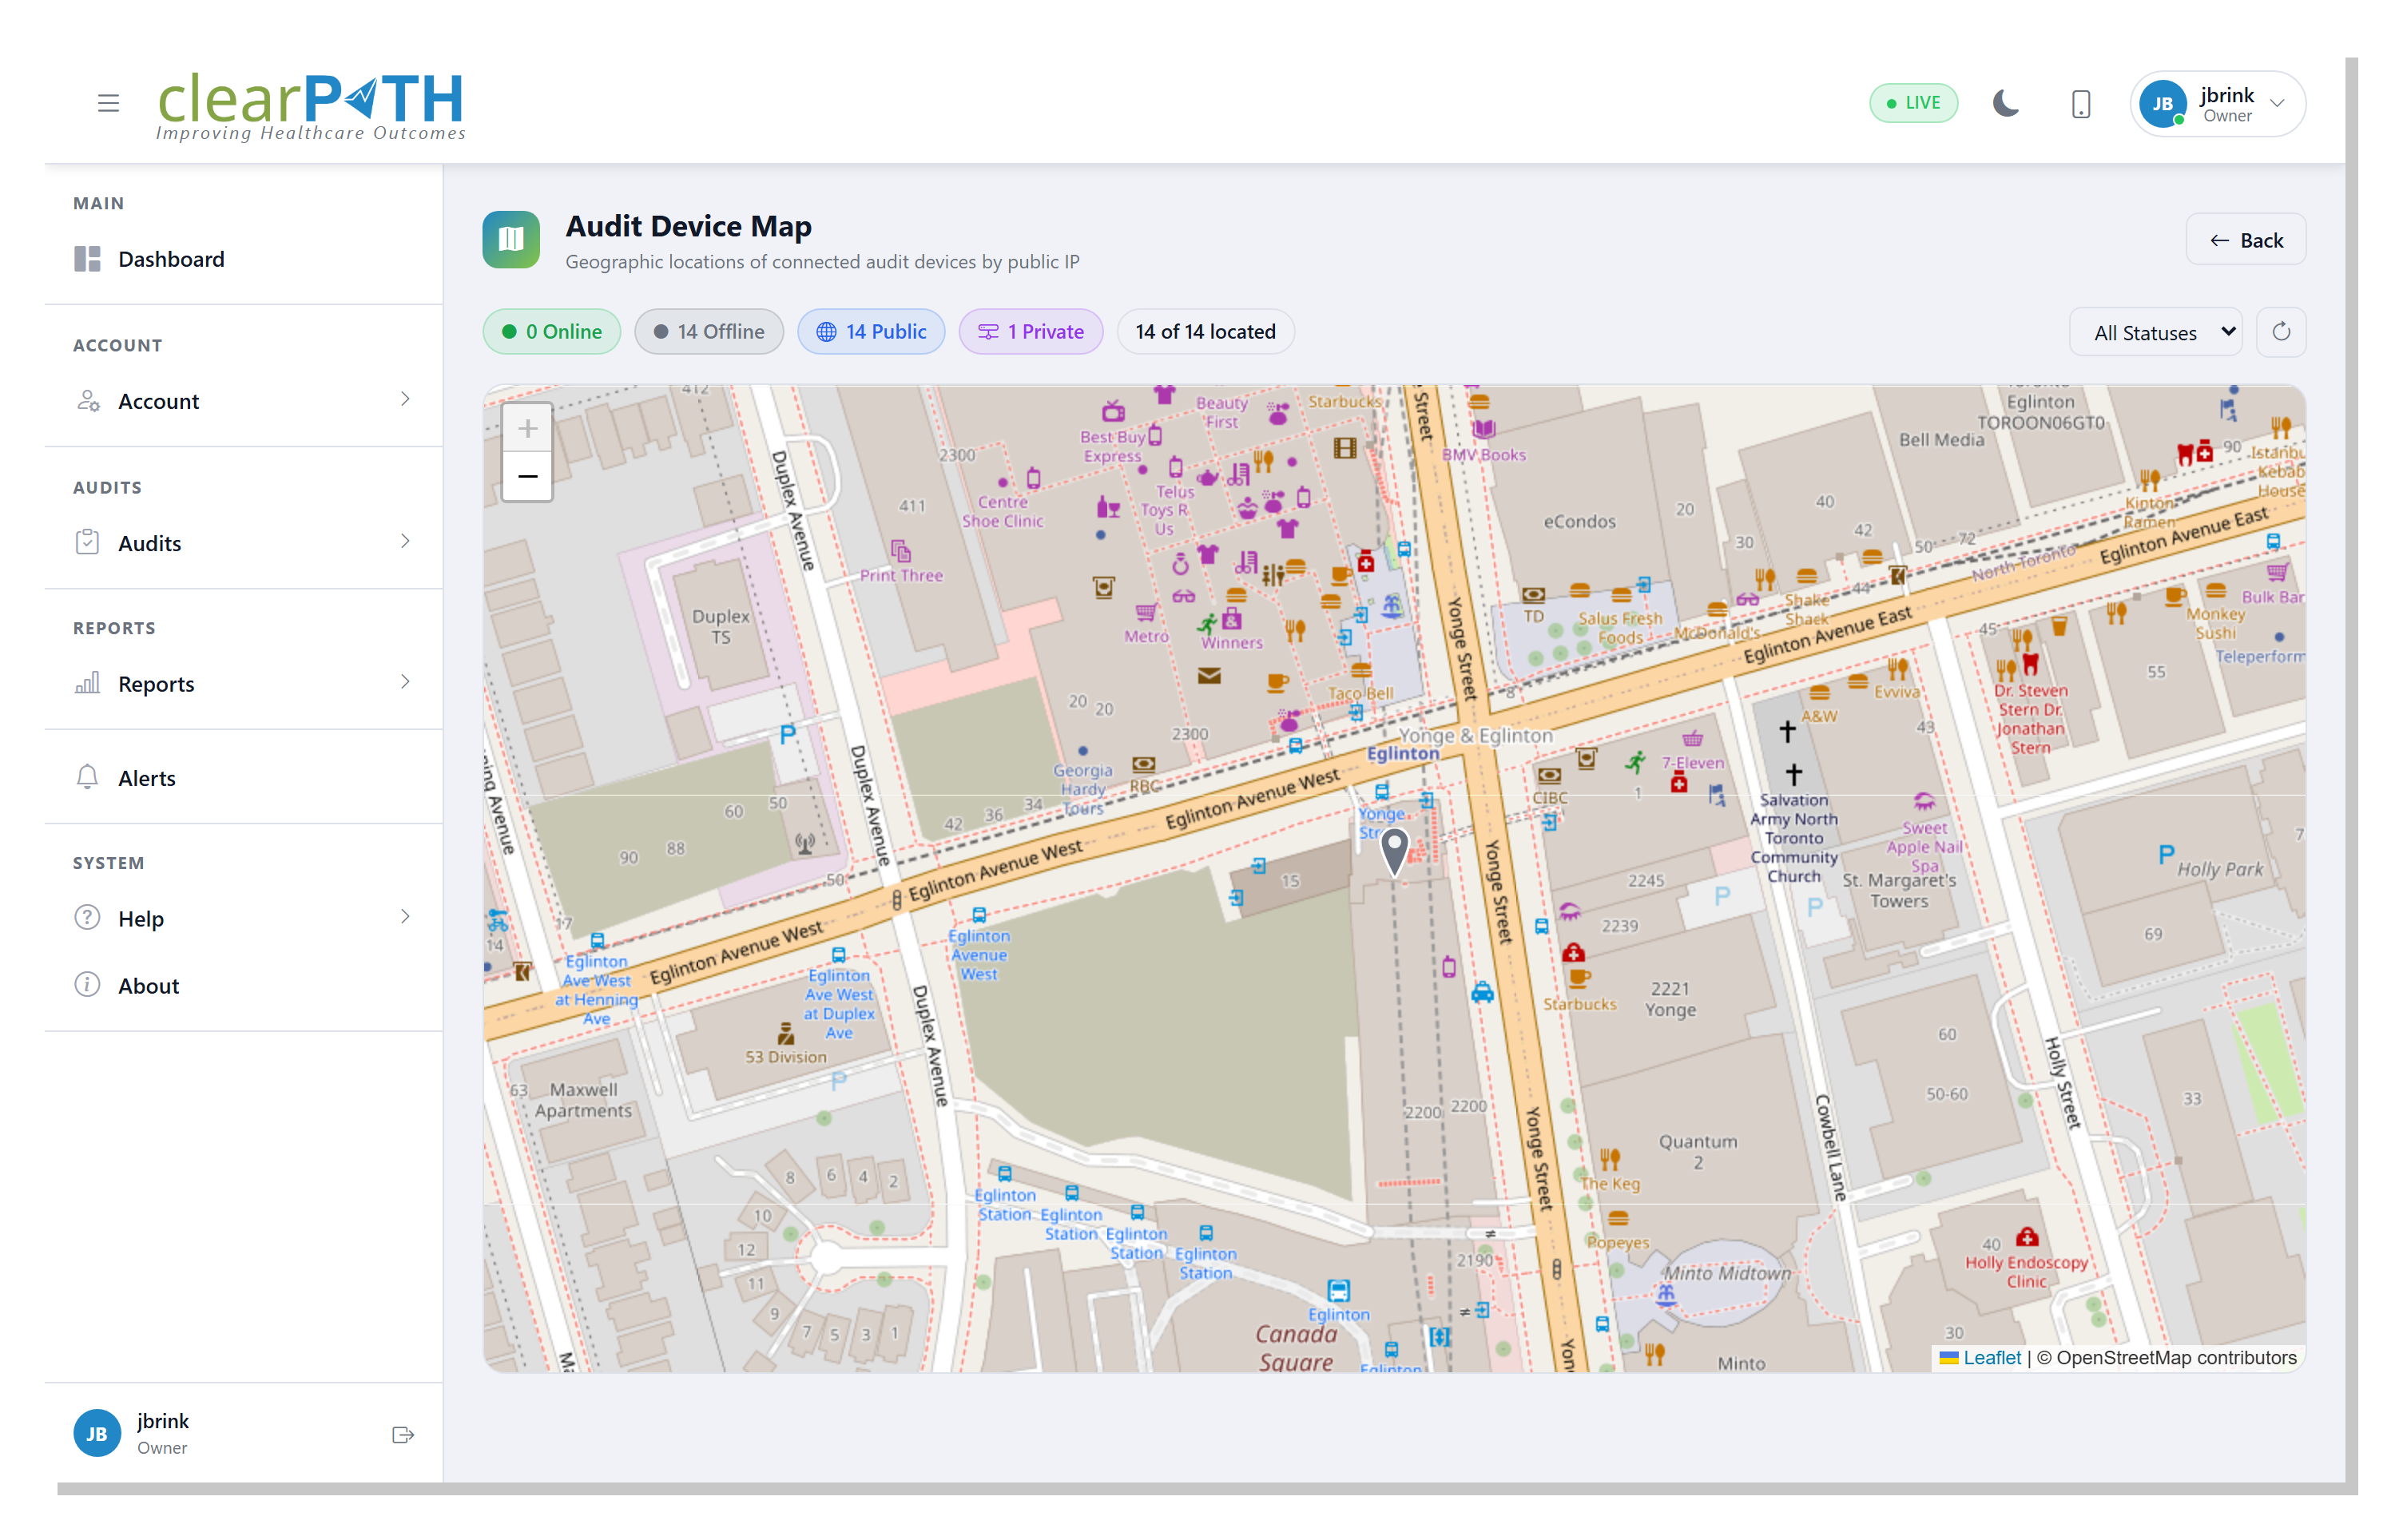
The chips at the top of the map show the split between online /
offline devices and between public / private IPs, and how many
devices could be located on the map. Use the All Statuses
dropdown to show only online or only offline devices.
Click a marker to see the device name, last-sync time, and the IP address it reported from.
Note
Devices on a private network (for example on-premise Wi-Fi behind
a NAT) cannot be located by IP — they are counted in the
Private chip but do not appear as pins on the map.
12.5. IP Location Popup
From the device list, click the IP address icon on any row to open the IP Location popup without leaving the list view. The popup shows the ISP, rough city, and a small Leaflet map centered on that location. This is the quick way to verify a new device is connecting from where you expect before approving it.